In the summer of 2019 we built a wood-fired oven in our backyard:
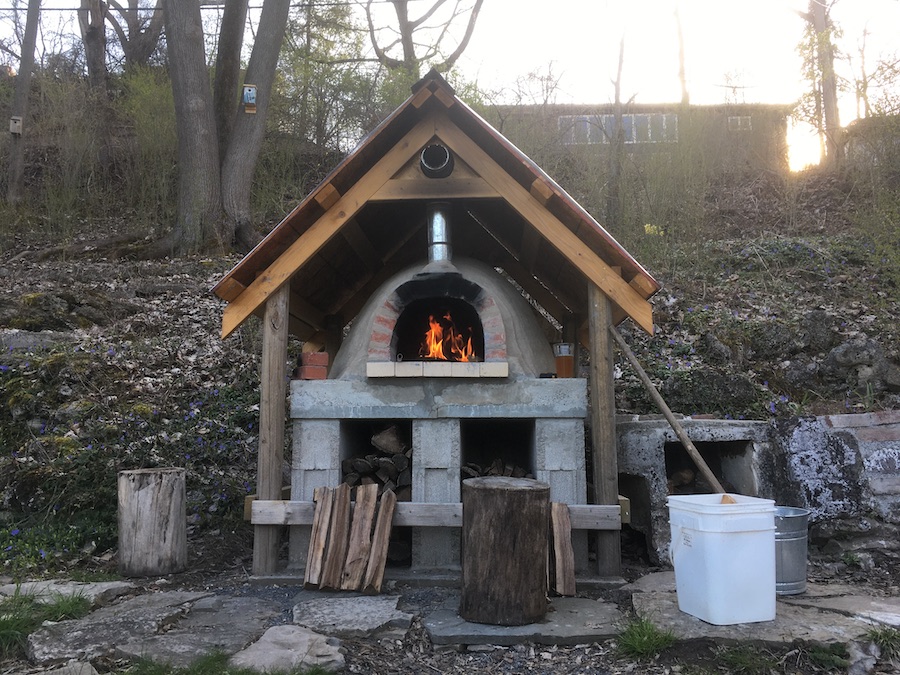
I thought I'd post a description of our process here in the hope that it may be of use to others who are thinking of doing a project like this, or to myself if I ever decide to build another one. First, let me give credit where it's due. We used the following resources for instructions on various aspects of the construction:
- Build Your Own Earth Oven by Kiko Denzer (my guiding spirit animal in this process)
- The Bread Ovens of Quebec by Boily and Blanchette (for OG old-school oven design)
- The Pompeii Oven Plans by Forno Bravo (mostly for the base)
- The Bread Builders by Alan Scott and Daniel Wing (just to realize that building a full masonry oven is more than we wanted, featuring Chad Robertson of Tartine on the cover)
- Various blogs and youtube videos including (but certainly not limited to): Build Naturally, Tyrant Farms, Norland Family, https://clayoven.wordpress.com, Annie Développe, and The Ultimate Clay Cob Oven Video
As we were building this, we also had the chance to check out some original Kiko Denzer ovens during a trip back to the West Coast, for example:
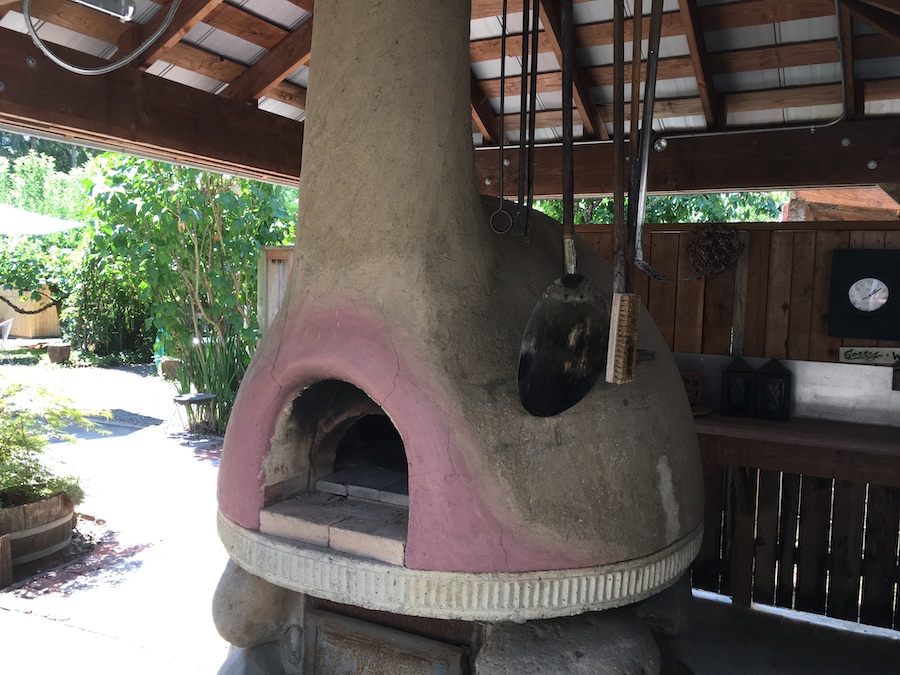
This one is at the Buena Vista House in Oregon. They have pizza night every Friday!
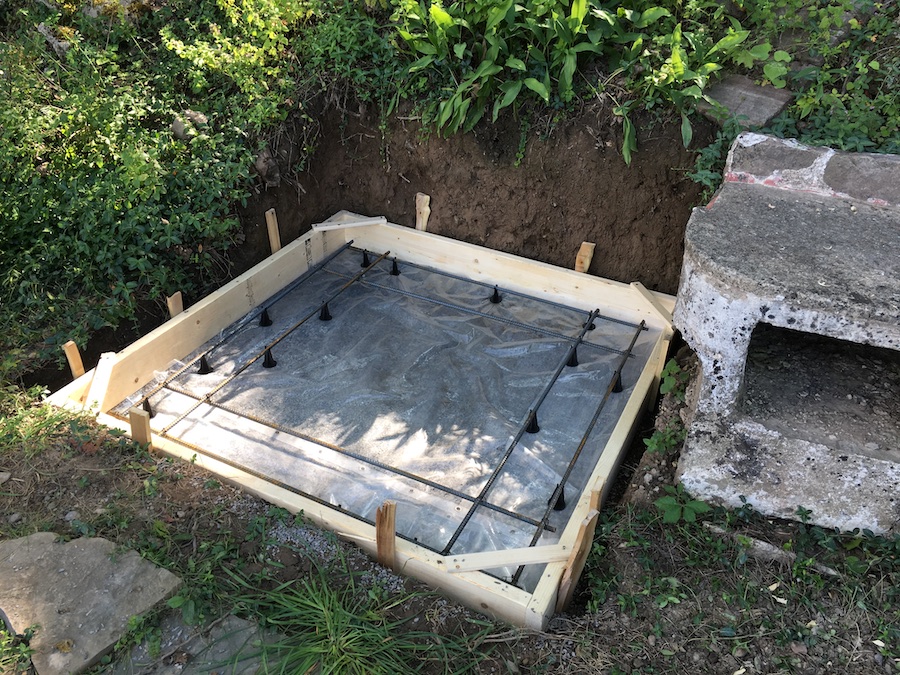
The Base
We are located in Central New York, which has long, cold, and reliably snowy winters. So we decided to play it safe and first pour a reinforced concrete slab on which to the build the oven base. This involved a fair bit of digging into the hillside, putting down a layer of gravel, laying out the frame, plastic sheeting over the gravel, some rebar, and finally a "remesh sheet" over the rebar (not pictured):
Then we mixed the concrete (by hand!) and poured the slab (we bought 28 60lb bags, probaby used around 20 for the slab):
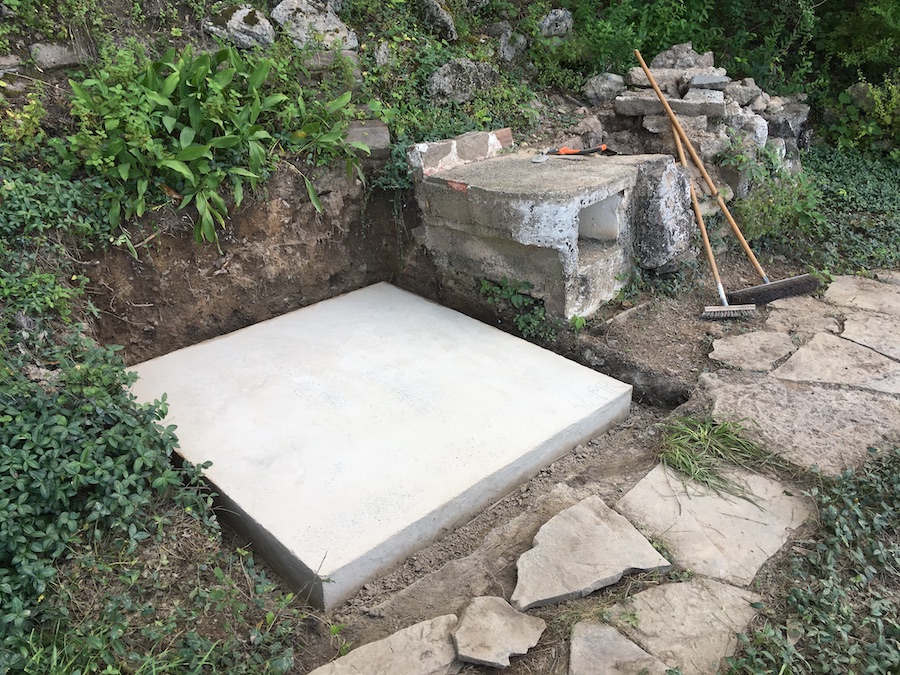
The dimensions of the concrete slab (so interior of the framing) is 56in x 56in. We went with this size because we knew the oven platform would be 4ft x 4ft, so this gave us a few inches more on each side. I'm 90% sure we used 2x6 lumber for the framing, making the slab 5.5in thick.
Next we built a cinderblock base, filling some of the cores in the cinderblocks with concrete and rebar for reinforcement (we expected there could eventually be fair bit of pressure coming from the hill at the back). The slab was sloped slightly downward towards the front for rainwater runoff, so getting the tops of the cinderblock walls level required some mortar work.
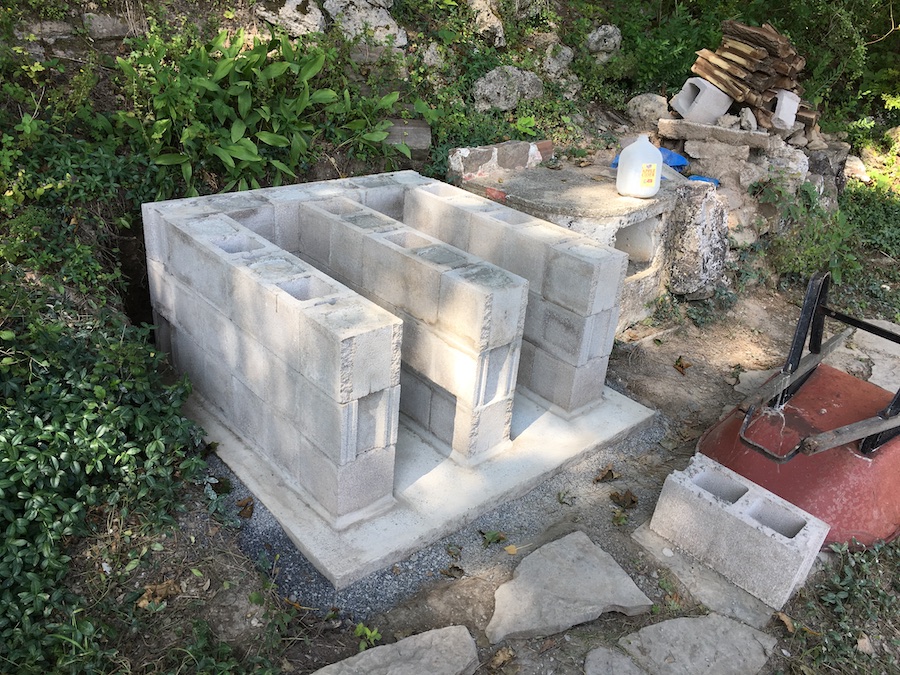
Finally, we laid four 2ft x 2ft concrete paving stones on top of the block walls to create the platform for the oven's hearth.
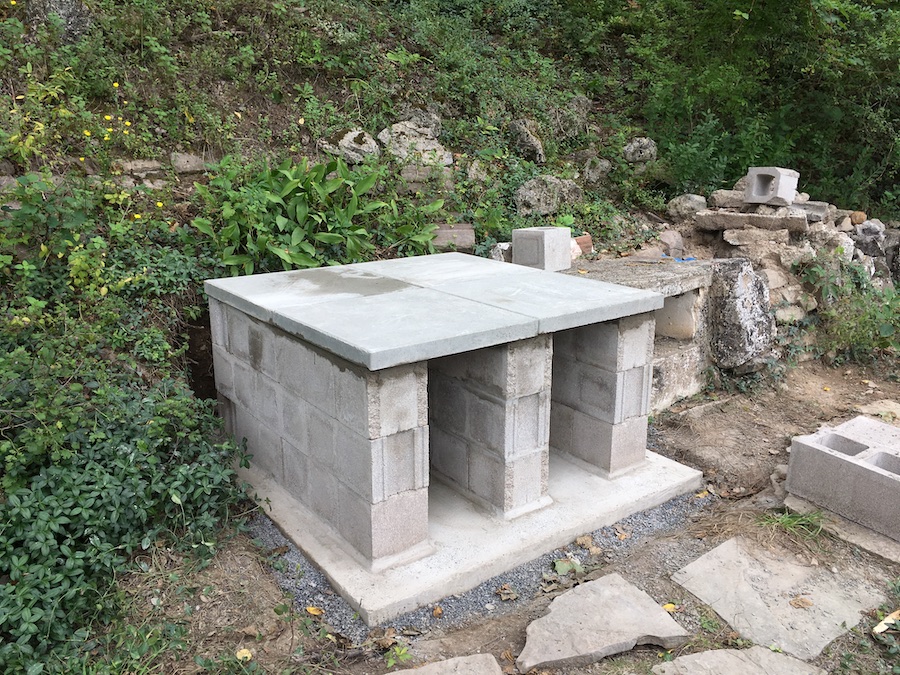 An alternative here would be to pour a "suspended hearth," as in the Alan Scott design, or to pour a concrete slab on top of the cinderblock walls, as in the Forno Bravo plans. We went with the paving stones to simplify this part of the process, though it required the third block wall down the center of the slab.
At this stage the base of the oven was complete. We actually did this part of the construction in the summer of 2018; we had planned on finishing that summer but were interrupted when I injured my back (unrelated to this). The rest of the process had to wait until the summer of 2019.
Archway and Door
In the meantime we worked on designing an arch and door for the oven.
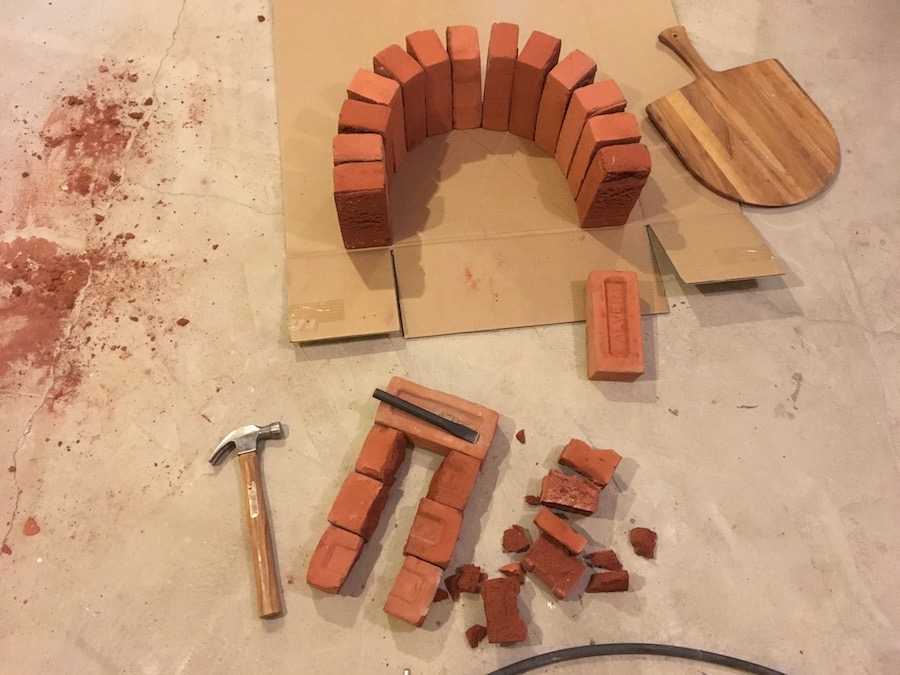
We laid out the arch on cardboard first, traced the outline, cut out the cardboard, and used that as a template to build the oven door, which we would then use as a form to build the arch:
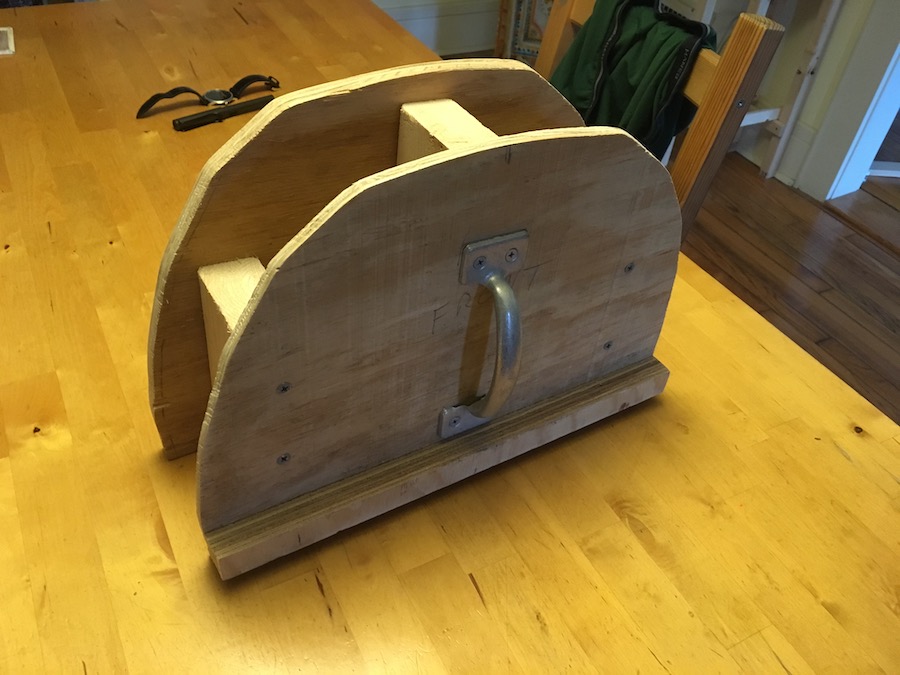
At this stage we had to start thinking about dimensions. Kiko (and other sources) recommend a dome height of about 16in. Boily and Blanchette discovered that Quebec ovens with an opening that was 63% of the dome height were most efficient (this percentage is also mentioned by Kiko and Alan Scott). So with a 16in dome height, that comes to 10in for the height of the opening/arch. After cutting out all the wood, the door ended up being 10.5in high, so a little more than we were aiming for.
The second dimension is the width of the opening. Kiko mentions that the opening is typically half of the oven diameter. With a 27in oven diameter (though NB we ended up going with 28in) that would mean a 13.5in wide arch. However: we wanted to be able to fit a standard 14in pizza peel through the doorway, and Alan Scott mentions (p114) that you can compensate for a wider door by making the oven deeper and going with an oval or egg-shaped oven footprint (like in Quebec ovens, rather than a circular footprint). So we went with a 15in width for the arch and door.
We also started to think about sand/clay mixtures for the main thermal layer of the oven. I tested the soil that I dug out from the hillside, but it contained very little clay, so we decided to buy clay instead. We went with Hawthorne 40 mesh clay that we bought from Clayscapes Pottery in Syracuse. We made test bricks to test out the amount of contraction and cracking with different clay:sand ratios (1:1, 1:2, and 1:3):
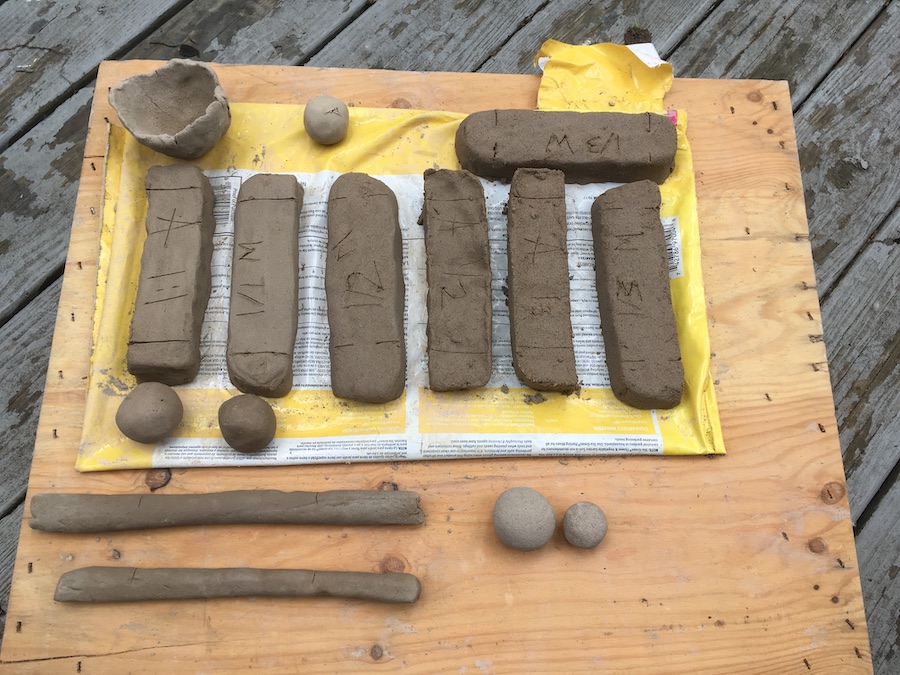
The 1:3 ratio feels more like sand than clay, which made us apprehensive, but you do need a large percentage of sand to prevent excessive cracking. I eventually emailed Jesse Cottingham from Wild Willows, who also used Hawthorne 40 clay, and he recommended a 1:2 ratio. We ended up splitting the difference and going with a 1:2.5 ratio, which seemed to work well, we had very little cracking in the thermal layer.